Dodge RamCharger Central banner

Rags80's '77 RC (update: 04-07-13)

20K views 61 replies 21 participants last post by  Rags80  
#1 ·
Image

Image

Image

Image


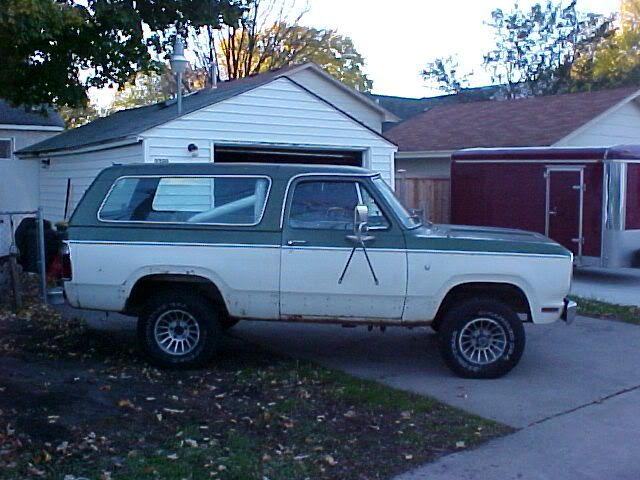
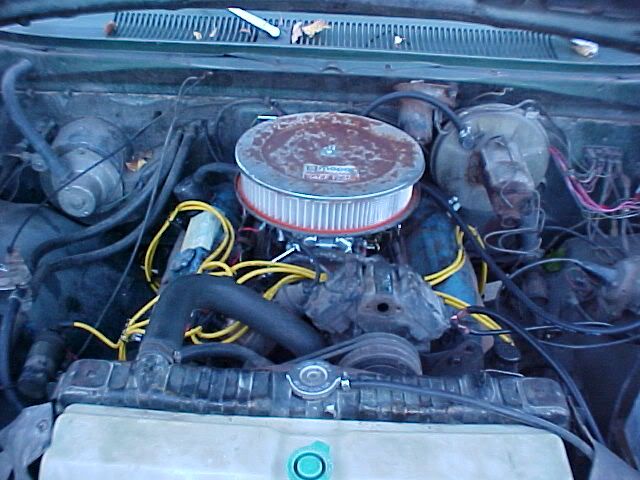
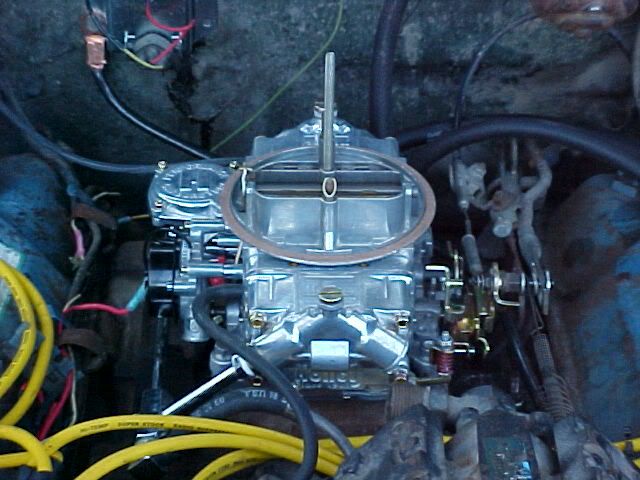
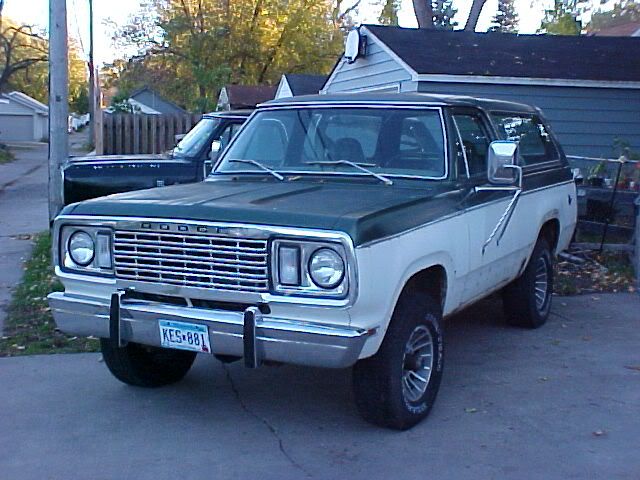
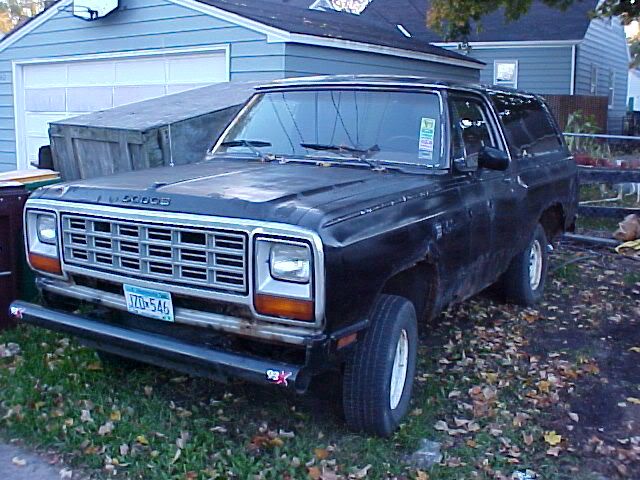
Stats: '77 RC 4x4 with a 400CI BB. I think it's got a 383 4bbl intake on top. I converted to 5 on 5.5 inch bolt pattern. I just put that holley 4160 on last weekend, I think my old 4011 had a leak around the throttle shafts, so I said screw it, and shelled out the dollars. I plan to lift it, put meats on it, and attack the rust next year, as well as work on the interior.

Image

Image


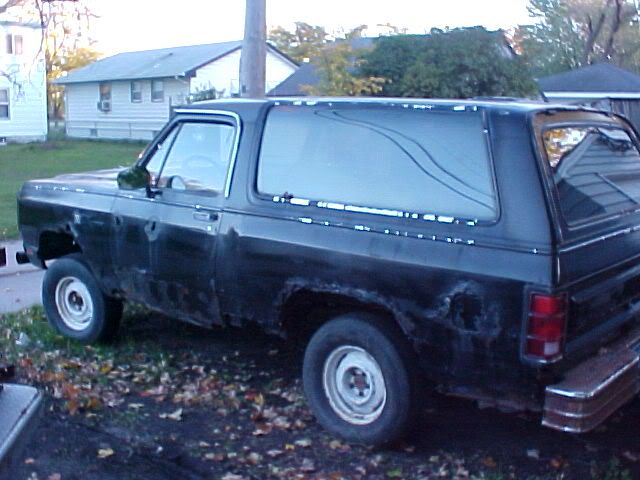
That was my 1st RC, it was a really reliable, allbeit rusty truck. Had it 6 years and was a blast, and the reason I bought the '77.

Both Ramchargers have less than 90k on the odometers.
 
#3 ·
the 77 looks great, the 83 needs work and the neighbors Jeep is nice too.
 
#5 ·
Sweet project!  I like the jeep, but I will take a RC over a jeep any day.  Also, maybe I'm just lazy and don't want to search, but what kind of wheels, lift, ect. ?
 
#6 ·
nice meats! how much was the tires and rims?
 
#7 ·
lift: rouch country all spring 4" lift. skyjacker brake lines, 4" drop pitman arm, and 2" sway bar drop.Â

tires: bfg at's 80% h2 take offs, 315/75/r17 $100 all four.

wheels: mb motoring predator 17x10 5x5.5" polt pattern  $147 ea (at the time)
 
#8 ·
those wheels and tires look sweet on your ramcharger. do you know what backspacing the wheels have? also do they have open center caps available for the front wheels? i have the same lift on my 92 except i'm only running 33's. do you have rubbing with the 35's? your truck is looking really good. keep up the nice work.
 
#10 ·
i just relized that the wheels are painted instead of aluminum. they really full you. i really like them. what else do you have planned for your truck?
 
#11 ·
body work (some rust to fix up) interior, I need seats, thinking about carpet, plus stereo system.  headers and 2.5inch exhaust, dunno what kind of mulflers to get yet (currently has dual glass packs that exit down just before the axel)  paint.  might go to 4:10 gears (3:55 currently)    might try to find a 440 to build up.
 
#15 ·
it's looking really good. that truck would look really good painted in the same colors with a set of the factory smaller mirrors on it. that's just my opinion though.
 
#16 ·
I'm looking around for the smaller mirrors, but the ones I come across are always broken. I might start looking for aftermarket ones.

I haven't decied on color sceme yet, I am not a fan of the green, tho.  I probobly won't get around to working on the rust until next spring.
 
#17 ·
lookin awesome man!
 
#22 ·
Nice truck! Like the 77-78 grill ,hood combination the best. The lift and wheels really give it a nice stance.
 
#24 ·
found some seats and will be do a little slide show on how I installed them, the pre-80's (removable top) RC's have a way differant floor than the permanant top RC's, making seat installation a bit more tricky. 

I found a pair of '04 trailblazer seats that have offset slide rails that allow for a lower mounting position while still allowing full function of the seat.

Pics to come soon.
 
#25 ·
Image


Baby blue just wasn't cuttinging it, but the real reason for the change is the lack of a shoulder belt (I feel naked witout one).

Image


Found a nice set out of a silverado, but base is just too damned tall, your knees would be though the steering wheel. I think on the '81 and newer rc's with the different floors they would work, but not on anything older.

Image
Â

These are out of a '04 trailblazer, notice how the inner rail mounts are higher (staggered)? These will work out nicely.

Image


Image


Image


Couldn't do it wihtout the help of my trusty work truck. (ford, ew)

Image


I removed the stock seatmounts by drilling out the rivets, buy a good drill bit. I had a cobalt, lasted the entire project. Also the drivers side slide I cut about and inch off the rear to allow for more clearance. It didn't affect the slide at all.

Image


Used some stove bolts (large rounded head) and some angle iron (2"x 3/16) to start the mounts.

Image


Image


Image


Mounted them in place and adjusted using more angle iron, vise grips, and some 2"x1/4 steel flat bar. (used on front inner mounts) I then tack welded them up with my new welder.

Image


I turned the inner mounts under the seats because I wanted to be sure I had enough room for a center console when I find one. All welded up.

Image


Almost there....   Will post finished product pics later...
 
#26 ·
Right on (thumbs-up) - looks real good. 

- M2